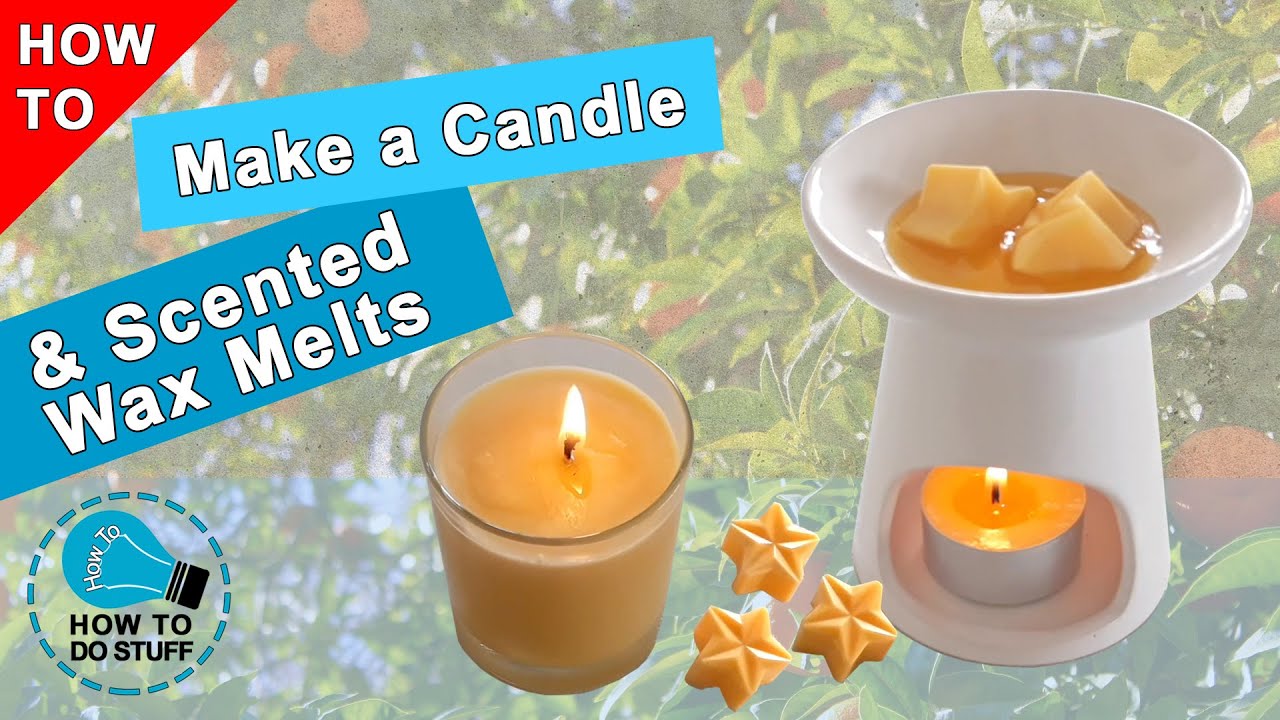
How to make candle wax from scratch – Embark on an illuminating journey as we delve into the art of candle making, exploring the secrets of crafting candle wax from scratch. From selecting the perfect raw materials to perfecting the pouring technique, this comprehensive guide will empower you to create exquisite candles that will illuminate your home with warmth and fragrance.
Through detailed instructions and practical tips, you’ll discover the intricacies of melting, filtering, and adding color and fragrance to your wax. Prepare molds, pour candles with precision, and finish them with finesse, creating unique works of art that will bring joy to your living spaces.
Raw Materials
Selecting the appropriate wax is crucial for candle making, as it influences the candle’s burn time, fragrance throw, and overall aesthetics. Various types of waxes are available, each with unique properties, availability, and cost considerations.
The most common types of waxes used in candle making include:
Natural Waxes
- Beeswax:Derived from honeybees, beeswax is a natural and sustainable wax known for its long burn time, pleasant aroma, and ability to hold fragrance well. However, it is relatively expensive and can be difficult to obtain in large quantities.
- Soy wax:Made from soybeans, soy wax is a popular choice due to its eco-friendliness, affordability, and good fragrance throw. It has a creamy texture and burns cleanly, making it suitable for both scented and unscented candles.
- Coconut wax:Extracted from coconuts, coconut wax is known for its smooth, creamy texture and excellent fragrance throw. It is also biodegradable and sustainable, making it an eco-conscious option.
- Palm wax:Derived from palm oil, palm wax is a versatile wax with a high melting point and good fragrance retention. It is relatively inexpensive and easy to obtain, but it has environmental concerns associated with its production.
Synthetic Waxes
- Paraffin wax:A petroleum-based wax, paraffin wax is the most widely used wax in candle making due to its low cost and easy availability. It burns cleanly and has a good fragrance throw, but it is not biodegradable and can produce soot when burned.
- Gel wax:A synthetic wax made from mineral oil and polymers, gel wax is transparent and has a jelly-like consistency. It is often used in decorative candles and can be colored or scented to create unique effects.
- Microcrystalline wax:A highly refined petroleum-based wax, microcrystalline wax is known for its hardness, flexibility, and high melting point. It is often blended with other waxes to improve their properties.
Table: Comparison of Wax Properties
| Wax Type | Burn Time | Fragrance Throw | Availability | Cost |
|---|---|---|---|---|
| Beeswax | Long | Good | Limited | High |
| Soy wax | Moderate | Good | Good | Moderate |
| Coconut wax | Moderate | Excellent | Good | Moderate |
| Palm wax | Moderate | Good | Good | Low |
| Paraffin wax | Short | Good | Excellent | Low |
| Gel wax | Moderate | Moderate | Good | Moderate |
| Microcrystalline wax | Long | Good | Good | Moderate |
The choice of wax depends on the desired characteristics of the candle, as well as the availability and cost considerations. Natural waxes are generally more expensive and less readily available, but they offer benefits such as sustainability and a cleaner burn.
Synthetic waxes are more affordable and widely available, but they may have environmental concerns and can produce soot when burned.
Melting and Filtering
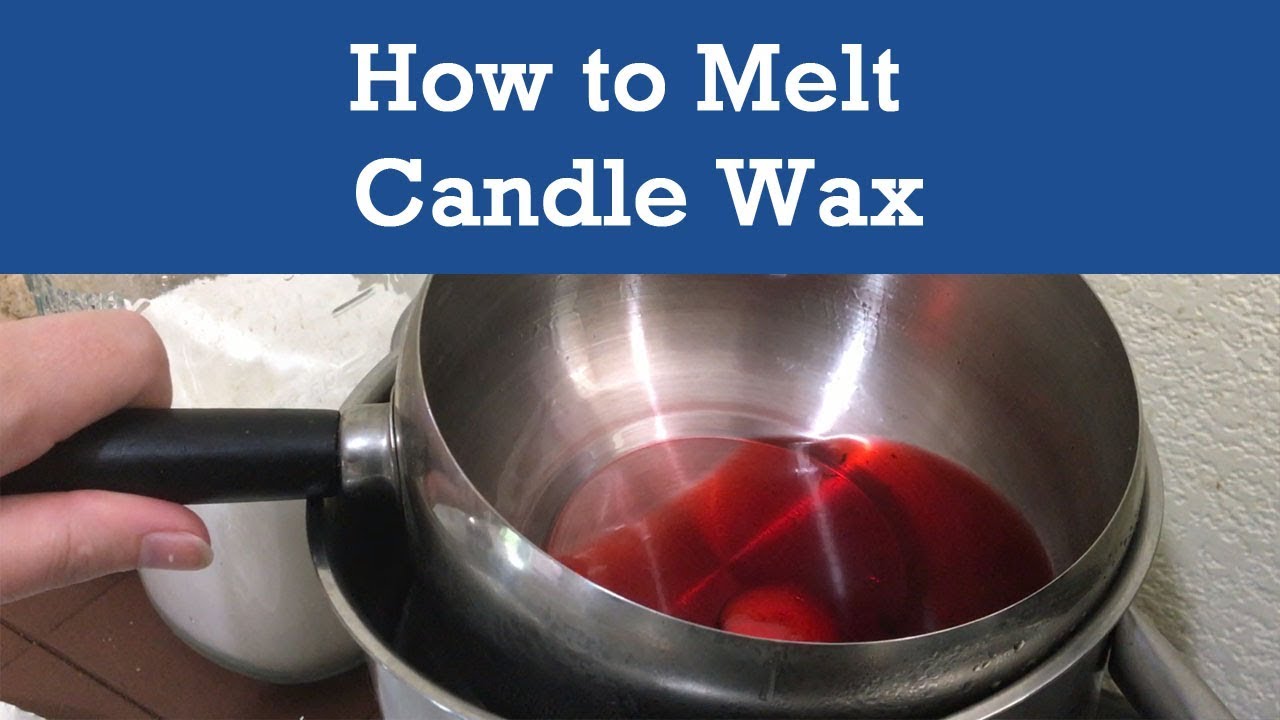
Melting the wax is a crucial step in candle making, as it allows you to blend different waxes and add fragrances or dyes. Filtering the melted wax removes impurities and ensures a smooth, even burn.
Equipment and Safety
For melting wax, you will need a double boiler or a heat-resistant container set over a pot of simmering water. A thermometer is essential to monitor the temperature of the wax. Additionally, wear heat-resistant gloves and safety glasses to protect yourself from hot wax.
Melting Process, How to make candle wax from scratch
Place the wax in the top container of the double boiler or in the heat-resistant container. Heat the water in the bottom container and stir the wax occasionally to ensure even melting. The temperature at which the wax melts varies depending on the type of wax used, so consult the manufacturer’s instructions for specific guidelines.
Filtering Process
Once the wax is melted, pour it through a fine-mesh sieve lined with cheesecloth or a coffee filter. This will remove any impurities or debris from the wax. You can also use a funnel with a filter paper to achieve a finer filtration.
Preparing the Molds
Preparing the molds is a crucial step in candle making as it ensures the candles have the desired shape and size. There are various types of molds available, each with its own characteristics and suitability for different candle designs.
Types of Molds
- Silicone Molds:These are flexible and easy to use, making them ideal for beginners. They allow for intricate designs and easy candle removal.
- Plastic Molds:Durable and affordable, plastic molds are suitable for simple shapes and provide a smooth surface finish.
- Metal Molds:Sturdy and long-lasting, metal molds offer precise shapes and can withstand high temperatures, making them suitable for larger candles.
- Glass Molds:Transparent and elegant, glass molds allow for unique candle designs with visible layers or embedded objects.
Preparing the Molds
Before pouring the wax, it is essential to prepare the molds to ensure proper wick placement and prevent wax leakage. Here are some steps to follow:
- Clean the Molds:Wash the molds thoroughly with soap and water to remove any dirt or debris that may interfere with the candle’s surface.
- Wick the Molds:Cut the wicks to the appropriate length for the mold and wax type. Center the wick and secure it at the bottom of the mold using a wick holder or adhesive.
- Centering the Wick:Use a chopstick or other tool to ensure the wick is centered in the mold. This will prevent the candle from burning unevenly.
- Using the Correct Wick Size:The wick size should be appropriate for the mold size and wax type. A too-small wick may not provide enough flame, while a too-large wick can cause excessive smoke and soot.
Pouring the Candles: How To Make Candle Wax From Scratch
Pouring the melted wax into the prepared molds is a crucial step in candle making. To ensure a smooth and bubble-free finish, follow these steps:
Centering the Wick
Before pouring the wax, center the wick in the mold using a wick centering tool or a pair of chopsticks. This will help keep the wick straight and prevent it from shifting during cooling.
Pouring the Wax
Pour the melted wax slowly and steadily into the mold, starting from the center and working your way outwards. Avoid pouring too quickly, as this can create air bubbles. Use a pouring pot or a spoon to control the flow of wax.
Tapping the Mold
Gently tap the mold on a flat surface to release any trapped air bubbles. You can also use a heat gun or a hairdryer to gently warm the wax and help the bubbles rise to the surface.
Cooling and Trimming
Allow the candles to cool completely at room temperature. Once the wax has solidified, trim the wicks to about 1/4 inch above the surface of the candle. This will ensure a clean and even burn.
Finishing and Packaging

Once the candles have cooled and hardened, they can be finished and packaged. Finishing involves techniques like sanding, polishing, and decorating to enhance their appearance. Proper packaging is essential for protecting candles during storage or sale, and it also plays a role in branding and marketing.
Finishing Techniques
Sanding removes rough edges and creates a smooth surface. Polishing enhances the shine and gives the candle a professional finish. Decorating can involve adding embellishments like ribbons, labels, or scents to personalize the candles.
Packaging
Candles can be packaged in various materials like cardboard boxes, plastic containers, or decorative bags. The packaging should provide adequate protection during transport and storage, while also being aesthetically pleasing.
Labeling and Storage
Proper labeling is crucial for safety and legal compliance. It should include information like the candle’s ingredients, burn time, and any safety precautions. Candles should be stored in a cool, dry place away from direct sunlight to maintain their quality.
Final Summary

As you complete your candle-making adventure, you’ll possess a newfound appreciation for the artistry and science behind this ancient craft. Whether you seek to illuminate your home with flickering flames or create thoughtful gifts, this guide will empower you to craft candles that are both beautiful and functional, leaving a lasting impression on all who experience their glow.

